Making my own webpage and pushing to fabcloud
The first thing I did was to learn HTML and CSS. I can't say I'm an expert, but I got the basics from some tutorials online.
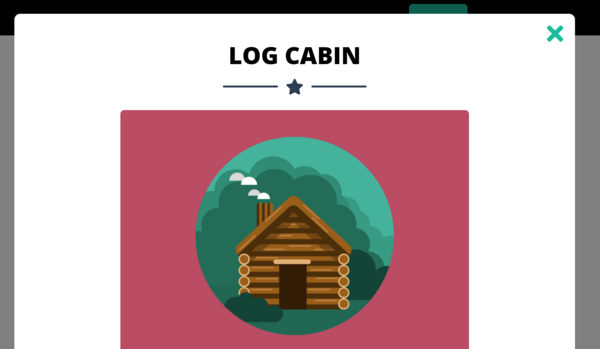
The first thing I did was to download a template from start bootstrap. This template included javasript and a lot of CSS that I didn't understand at first. I changed most of the colors, names and images, but I realized after all this was done that all the portfolio items were configuredd as "Modals".
These were nice, but I was going to need something more customizable as links to separate pages because I think I'm going to need to embed video and more text in each page, and this template din't suit my needs.
In the end,I decided to write a new HTML5 file from scratch, as well as a master CSS file to handle styling. For now, I think this will help me to better understand the workflow and to have something that is more customizable, but more simmple and without any javascript. This will help me learn more as I go along as opposed to just editing a template. W3 schools have a bunch of small tutorials on small functionalities of both CSS and HTML, so those helped a lot.
You are now viewing version 2 of my website, the stripped down version (no JS, no contact script etc.).
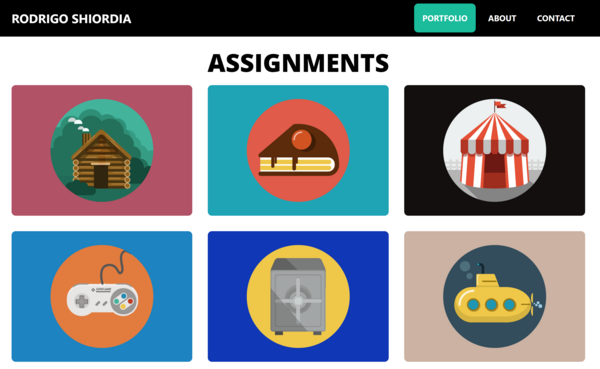
These are images of the first version:
The first version, as you see, had a navbar, a contact sheet, and the thumbnail grid, which I had to dumb down in order to have each image link to a new page (the template version opened a lighbox style page on top of the index page.
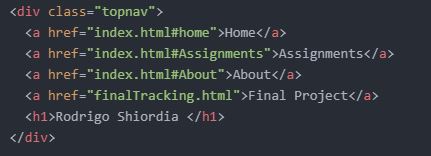
My Nav Bar is just a very simple HTML code, which I adapted from the original. Here you can see the original topnav HTML:
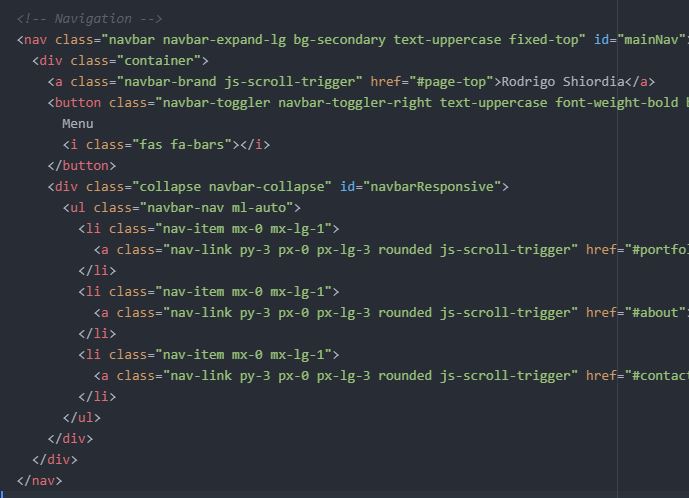 What I did with the topnav bar was just strip all javascript and leave the HTML with only links to the main pages:
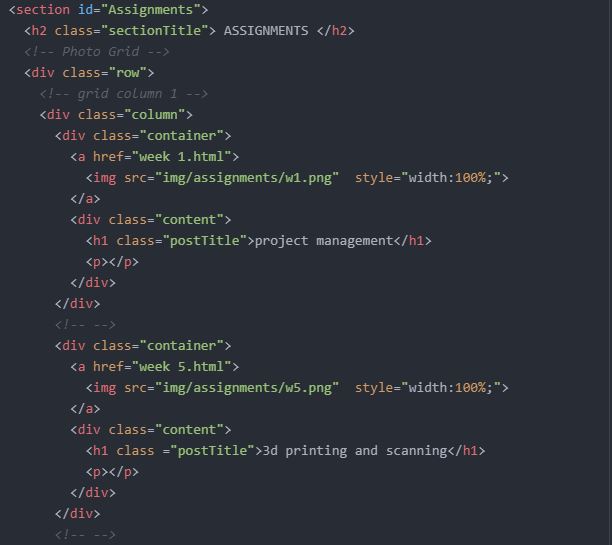
The next was the assignment index page, something like aportfolio grid. Again the template was just too complicated, and a lot of javascript. It looked something like this:
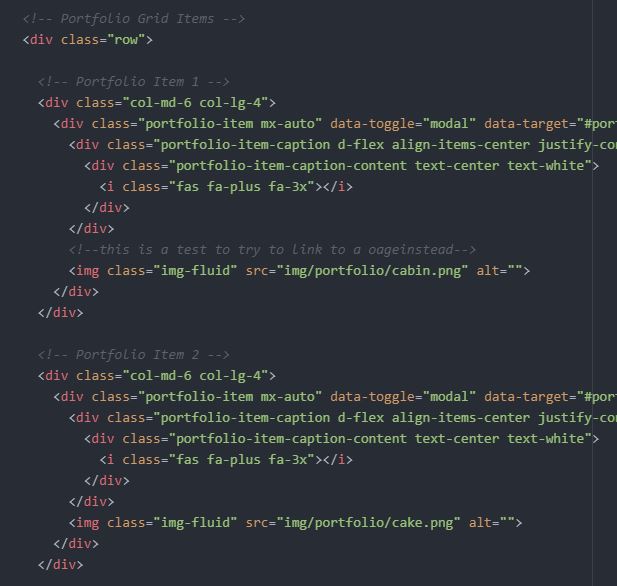
What I did was just strip everything from the grid elements, and leave them as separate links to other pages. Each grid item is a div container with an image that is the link, and the title as a header for the image as a div
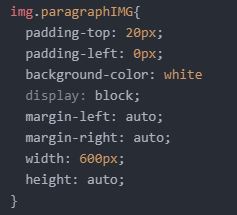
 The other thing I did, was just dumb down all the CSS from the template. It had a lot of types and classes, I just stuck with a couple of them. Mainly just formats for images and paragraphs, as well as the fonts. Most everything in my page will be aparagraph if class "DescriptiveText" which I confuigured like this on CSS:

Most images have the following format on CSS:
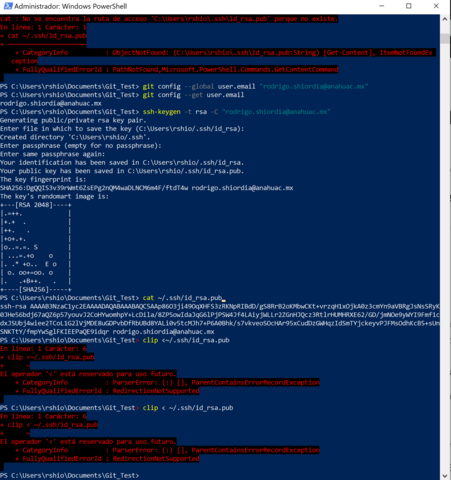
To push the content, I followed the tutorials on the fab academy site, and generated my SSH key and uploaded to gitlab. I
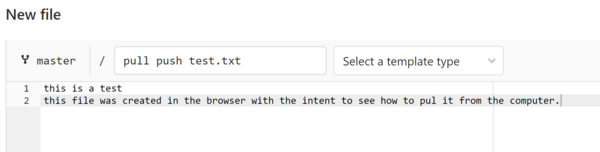
also used image Magick to resize images in batch. currently there are placeholder images, but when I have images for each assignment it'll look way better.
Pulling and pushing from Git.
The first step is to install Git. from here and install it for your system. I was using windows but very swiftly changed to linux/ubuntu.
After git is installed, you have to configure your user name and your email. Use these two commands on a terminal:
git config --global user.name "YOUR_USERNAME"
git config --global user.email "YOUR@EMAIL"
Once git is installed you have to generate SSH key and upload to gitlab. For that, you will use this command:
ssh-keygen -t rsa -C "your@email"
This will generate a string of text that you will copy on gitlab using the link profile settings>>>>ssh keys.
If everything goes well, you can now clone your repository going to the gitlab project page and hit the "clone with ssh" link.
Using a terminal, you'll navigate to the directory where you'll have the cloned repository and write:
git clone git@gitlab.fabcloud.org:academany/fabacademy/2020/....
note that everything after clone is the string you copied from the repository "clone with ssh" link.
Finally, you'll be able to pull the repository, and start adding files to the stack and committing changes. Every time you change files on your local drive, you'll do the following sequence:
- git add . to add the whole directory to the commit pipeline
- git commit -m "commit description" to stage the commit
- git push to push all changes to the online repository

There were several things that helped me do all of this faster. However I'd choose three things that were very time-saving:
- Typing in Atom, the most important thing is readability. I found that you can configure the keymap in atom to have something like 'Ctrl+}' to auto-indent. If you do 'ctrl+a' to select all, and then auto indent, you will save a lot of time keeping your html code nice and neat.
- You are continously looking at your changes, so you need a live preview page if you are doing your page just writing, cipying and pasting code. Two options: get the Atom live preview add in, or in chrome, just do 'ctrl+F5'. If you have chrome open, you can go 'alt+TAB' and then quickly 'ctrl+F5'. You get to do it mega fast after a while.
- Finally, like I said, image magick is the way to go for batch resizing. Make sure you keep track of file sizes. This site is 3MB large, so I'm doing quite well I think. The command is:
mogrify -resize '600x528' *.png
Atom is a very nice app to use to edit text. Here is a screenshot of its interface and text.
A very good plugin for it is the HTML viewer that you can add from the add-on screen.
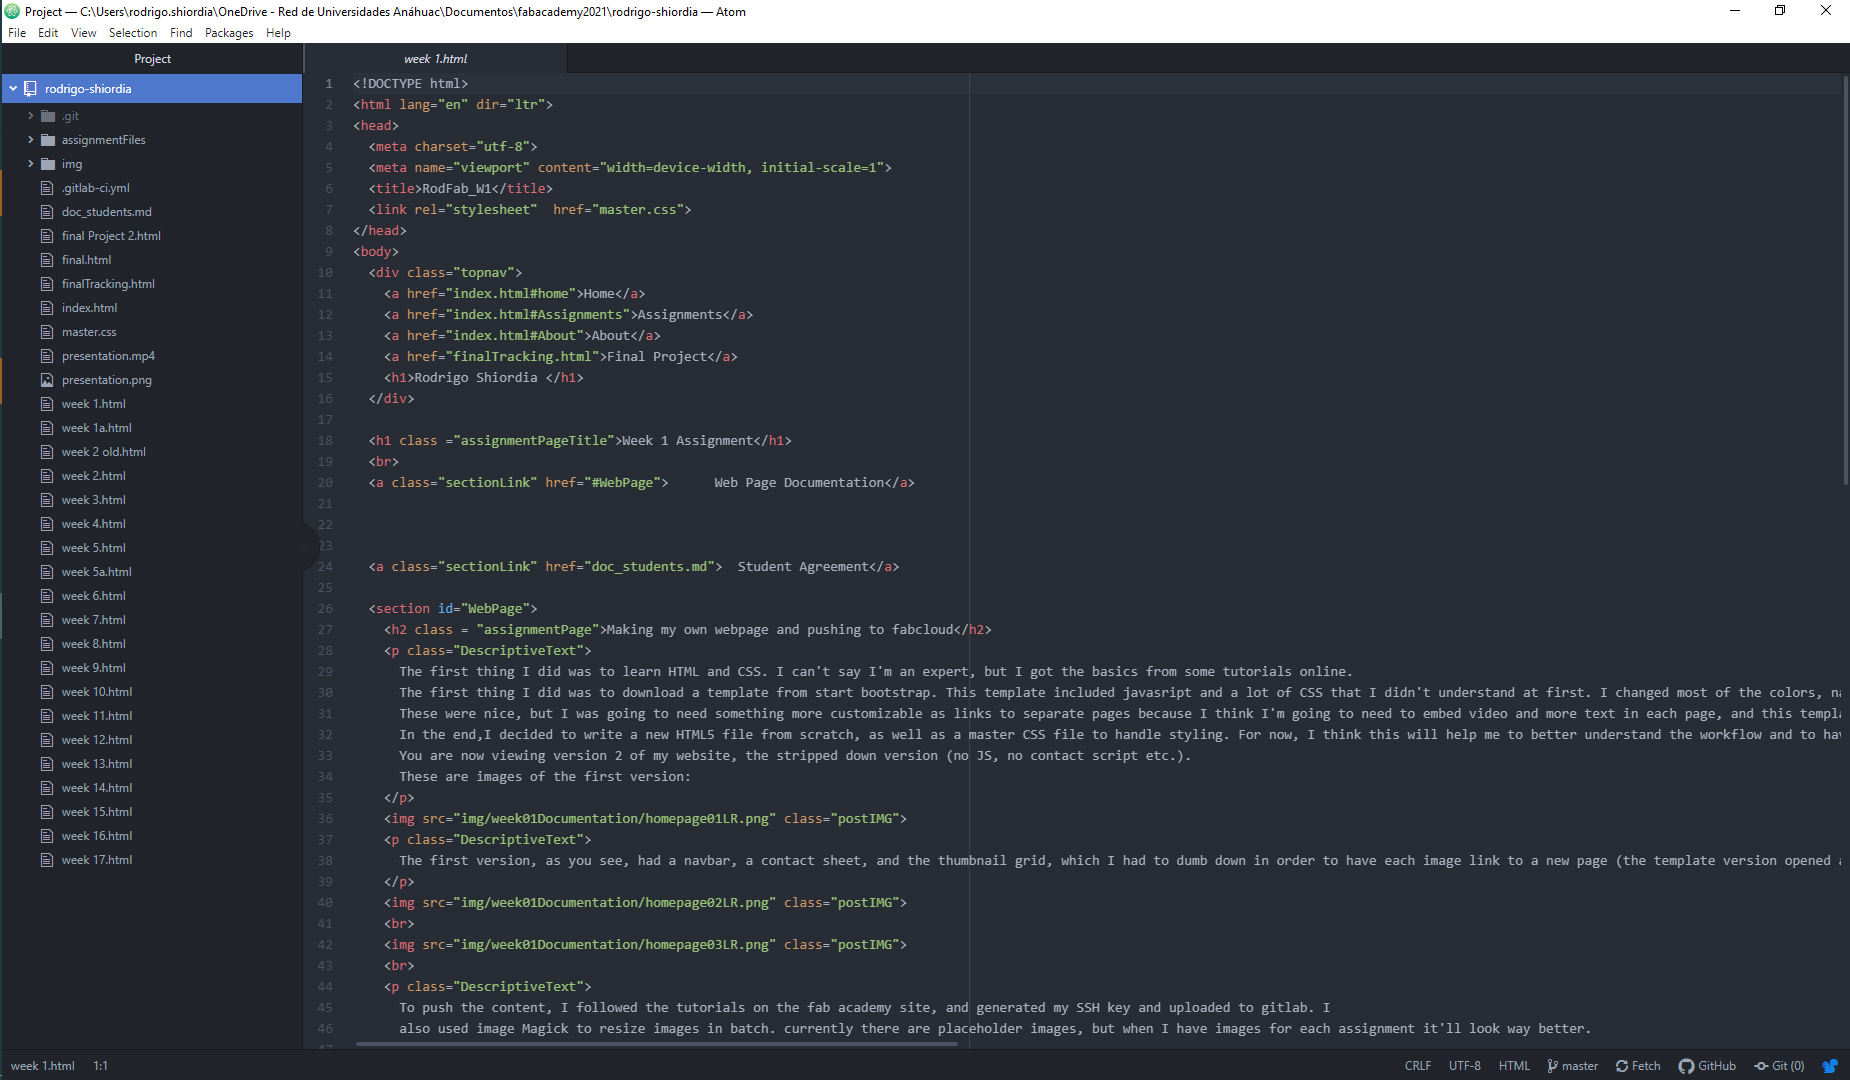
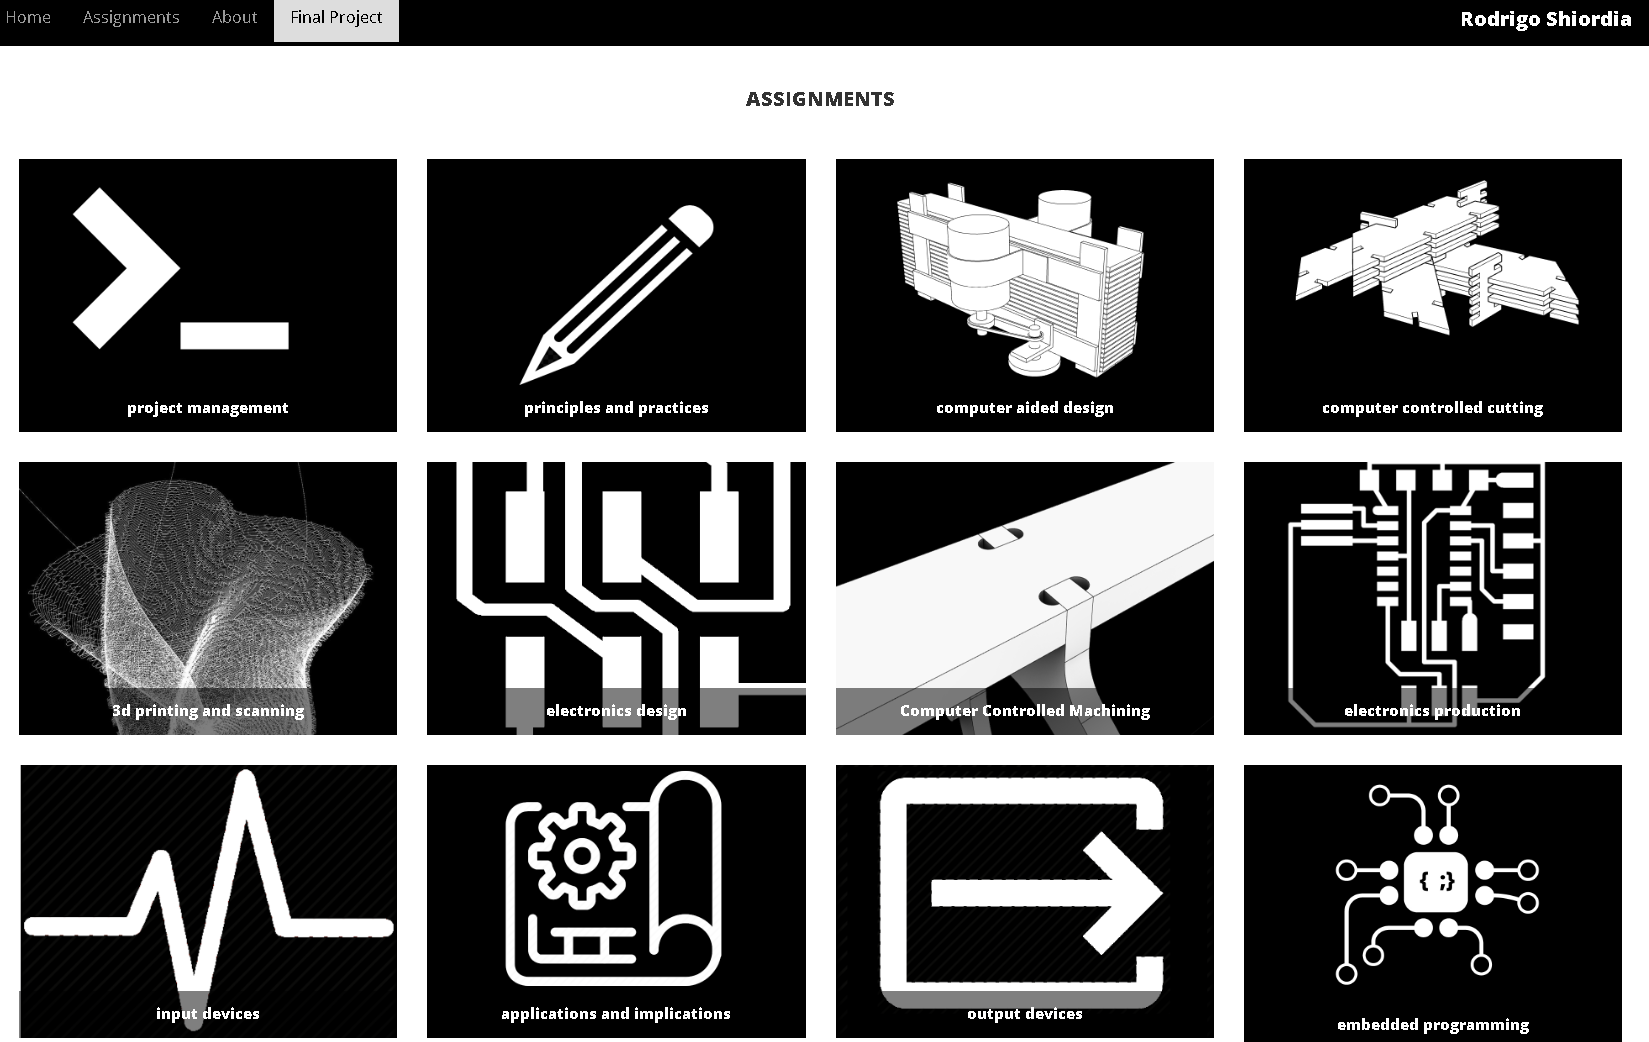
My final page looks like this:

It has a title bar with the links to Home, About, and Final Project pages, as well as the assignments page.
The Assignments page is a grid with all the links to the assignments. It looks like this: